How to Choose a Micro Sprinkler Irrigation System?
Choosing an irrigation system is less about buying the smallest sprinkler and more about matching water delivery to the site. Micro Sprinkler Irrigation can suit garden beds, young trees, nurseries, and other areas that need gentle, targeted coverage. Its fine spray can reduce runoff on suitable soils, but performance depends on layout, pressure, and maintenance. Small details matter. A nozzle that works well in one bed may leave dry patches in another.
Before choosing equipment, note your crop spacing, bed dimensions, water source, and local wind exposure. Compare each sprinkler’s flow rate, wetted diameter, and recommended operating pressure with the manufacturer’s specifications. Check whether your pump and pipes can supply the required flow without uneven pressure at the far end of the line. Water quality deserves attention, too; sediment or mineral deposits can clog small outlets. A filter helps, but the right type and mesh size depend on the water and system design.
Consider how easily you can inspect, clean, and replace components. A low-cost kit may look appealing, yet spare parts and clear installation guidance can matter more over time. And sometimes, the neatest layout on paper still needs adjustment in the field. This guide explains what to assess, from coverage and filtration to controls and upkeep, so you can compare options with practical evidence rather than broad claims. Expect trade-offs. The best choice is the one that delivers consistent coverage for your conditions and can be maintained reliably.
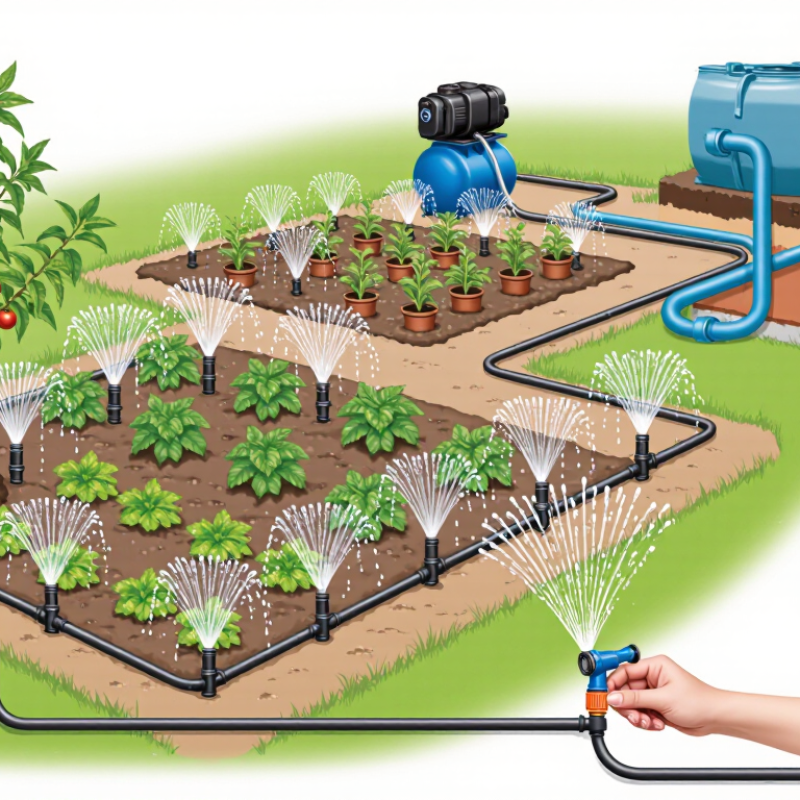
Define Crop, Soil, and Coverage Needs for a Micro-Sprinkler System
How to Choose a Micro Sprinkler Irrigation System?
Define Crop, Soil, and Coverage Needs for a Micro-Sprinkler System
Start with the crop, not the catalog. Seedlings and shallow-rooted vegetables need frequent, gentle watering; established shrubs may need wider coverage. Check the mature canopy, row spacing, and whether foliage should stay dry. Micro-sprinklers wet a broader area than drip emitters, but wind can push droplets beyond the root zone. The FAO’s 2017 report, Water for Sustainable Food and Agriculture, estimates that agriculture accounts for about 70% of global freshwater withdrawals. Efficient placement matters.
Soil changes the pattern. Sandy soil drains quickly, so use smaller wetted areas and shorter, more frequent runs. Clay holds water longer, but a high application rate can cause pooling. Compare nozzle flow and operating pressure with your water supply; a pressure gauge and catch cups can reveal uneven output. Measure actual wetting in the field. A diagram alone can mislead.
Tips: Test one row first. Set out cups, run the system, and compare collected water. Adjust spacing or pressure if some cups stay nearly dry. Recheck after plants grow; coverage needs change, and the first layout may not be quite right.
Compare Flow Rates, Wetted Diameters, and Typical 15–30 psi Pressure Ranges
A micro sprinkler should match the crop spacing, soil, and available pressure. Check the emitter’s flow rate, usually listed in gallons per hour, at its stated operating pressure. A higher flow rate is not automatically better: sandy soil may absorb water quickly, while clay can puddle under heavy application.
Many micro sprinklers are designed to operate around 15–30 psi, but this is a typical range, not a universal rule. Read the emitter specifications and measure pressure near the irrigation line with a gauge while water is flowing. Static pressure can look adequate, yet drop when several sprinklers run together. Filters, narrow tubing, elevation changes, and partially clogged outlets can all affect performance. Small differences matter.
Wetted diameter describes the approximate span of water reaching the ground. Treat it as a starting point, since wind, nozzle height, and pressure can change the actual pattern. Place catch cups around a test sprinkler and run it for a set time; compare the collected amounts and look for dry gaps. Wind changes everything. Overlap neighboring patterns enough to avoid bare strips, but check that water is not landing on paths or walls. Field measurements may disagree with catalog figures, and that is worth investigating before expanding the layout.
How to Choose a Micro Sprinkler Irrigation System? Compare Flow Rates, Wetted Diameters, and Typical 15–30 psi Pressure Ranges
| Representative Sprinkler Setup | Typical Operating Pressure | Flow at 15 psi | Flow at 20 psi | Flow at 30 psi | Wetted Diameter at 15 psi | Wetted Diameter at 20 psi | Wetted Diameter at 30 psi | Common Use |
| Low-flow, 360° pattern | 15–30 psi | 8 gph
(30 L/h) | 9.2 gph
(35 L/h) | 11.3 gph
(43 L/h) | 10–14 ft
(3.0–4.3 m) | 11–15 ft
(3.4–4.6 m) | 12–17 ft
(3.7–5.2 m) | Small beds, young trees, and close-spaced plants |
| Medium-flow, 360° pattern | 15–30 psi | 12 gph
(45 L/h) | 13.9 gph
(53 L/h) | 17.0 gph
(64 L/h) | 14–18 ft
(4.3–5.5 m) | 16–20 ft
(4.9–6.1 m) | 18–23 ft
(5.5–7.0 m) | Orchards, shrubs, and medium-sized planting areas |
| Higher-flow, 360° pattern | 15–30 psi | 20 gph
(76 L/h) | 23.1 gph
(87 L/h) | 28.3 gph
(107 L/h) | 18–24 ft
(5.5–7.3 m) | 21–27 ft
(6.4–8.2 m) | 24–30 ft
(7.3–9.1 m) | Larger trees and wider-spaced planting areas |
| Medium-flow, 180° pattern | 15–30 psi | 12 gph
(45 L/h) | 13.9 gph
(53 L/h) | 17.0 gph
(64 L/h) | 14–18 ft
(4.3–5.5 m) | 16–20 ft
(4.9–6.1 m) | 18–23 ft
(5.5–7.0 m) | Rows, field edges, and areas next to boundaries |
| Medium-flow, 90° pattern | 15–30 psi | 12 gph
(45 L/h) | 13.9 gph
(53 L/h) | 17.0 gph
(64 L/h) | 14–18 ft
(4.3–5.5 m) | 16–20 ft
(4.9–6.1 m) | 18–23 ft
(5.5–7.0 m) | Corners and narrow planting strips |
Selection note: These are representative planning estimates, not guaranteed specifications for every sprinkler. Actual flow and wetted diameter depend on the nozzle, sprinkler design, pressure at the device, water quality, elevation, wind, and installation. Confirm product specifications and use overlapping coverage appropriate to the crop and soil.
Select Filtration to Match Emitter Specifications; 120 Mesh Is a Common Benchmark
When choosing a micro sprinkler system, match filtration to the emitter’s stated requirements. A 120-mesh filter is a common benchmark, not a universal rule. Some emitters need finer filtration, while others tolerate larger particles. Check the product specification for the required mesh or micron rating before buying. Mesh counts can vary between filter types, so compare the stated opening size when possible. Small openings clog. A filter that is too coarse may let grit and organic debris reach the nozzles.
Your water source matters, too. Well water may carry sand, while ponds can contain algae and plant fragments. A screen or disc filter may suit some water supplies; heavier sediment may call for a different setup. The right choice depends on both the debris and the emitter’s limits. Install a pressure gauge before and after the filter, then watch for a growing pressure difference. That matters. Clean or flush the filter as its instructions recommend, and inspect a few emitters for uneven spray. One overlooked detail is maintenance access: a filter that is hard to open often gets neglected. Filtration reduces clogging risk, but it cannot fix every water-quality problem.
Check Pump Capacity, Pressure Regulation, and Field Performance Before Purchase
A micro sprinkler system is only as reliable as its pump at the required operating pressure. Add the flow rates of all sprinklers running in one zone, then allow for pipe friction, elevation changes, and filter losses. A pump’s headline flow rate alone can mislead. Check its performance curve at the pressure your layout actually needs. The FAO report Water for Sustainable Food and Agriculture estimates that agriculture accounts for about 70% of global freshwater withdrawals, making careful irrigation design worthwhile. Small details matter.
Pressure regulation deserves a field check, not just a catalog comparison. Install a gauge near the pump and another at the far end of a lateral. Large differences can cause uneven spray and dry patches. USDA NRCS microirrigation guidance treats pressure control and emission uniformity as core design considerations. Test coverage with catch cups across the field; compare collected volumes after the same run time. Wind can distort the result, so repeat the test in calmer conditions. Also inspect wetted areas around plants, since a neat test layout may not reflect real soil or crop spacing. It is easy to trust one promising test too much. That is a mistake worth avoiding.
Micro Sprinkler Pump Flow: Match Capacity to System Demand
Estimated flow demand for different sprinkler counts, calculated using an assumed discharge of 40 L/h per sprinkler.
Flow demand is calculated as sprinkler count × 40 L/h and converted to m³/h. This is a planning example, not a product specification. Before purchasing, confirm the pump can deliver the required flow at the system’s operating pressure, accounting for elevation and pipe losses. Check pressure at the start, middle, and end of the laterals, and assess spray coverage in the field.